This post may contain affiliate links. I may receive commissions for purchases made through links in this post at no cost to you.. Spartan753 jeri ryan and nude
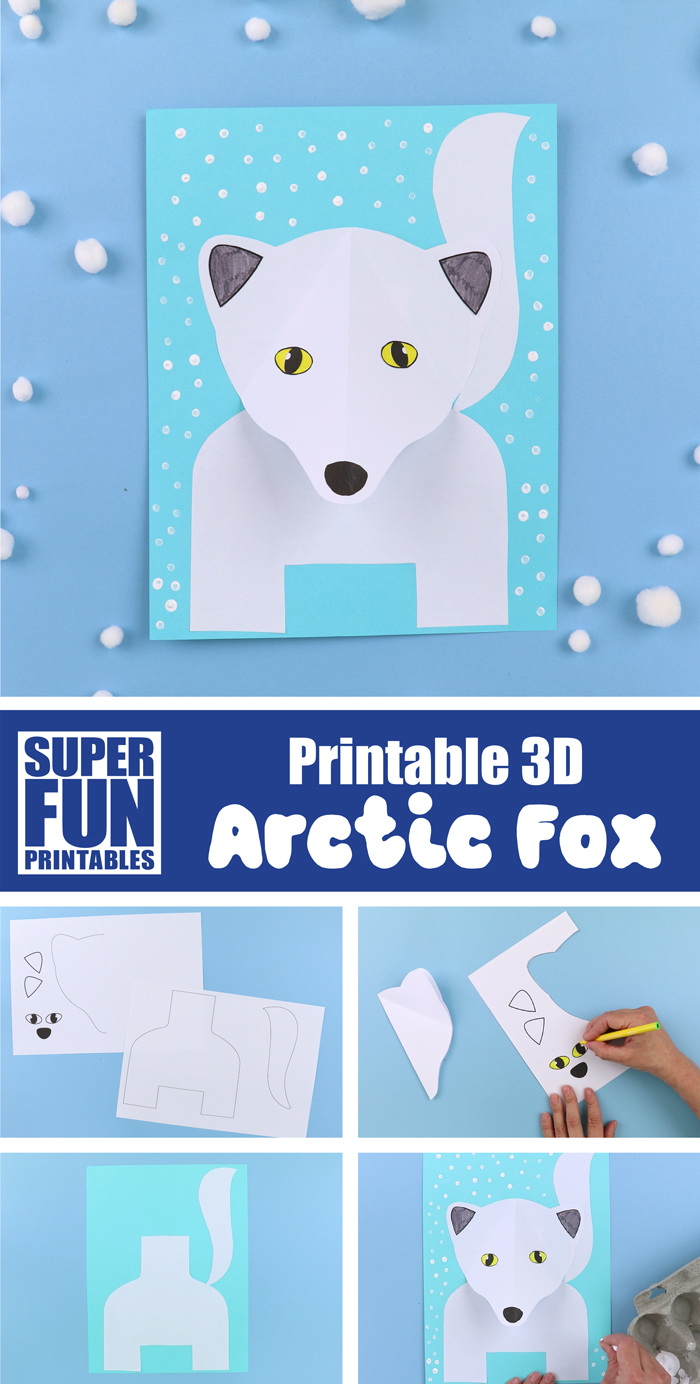
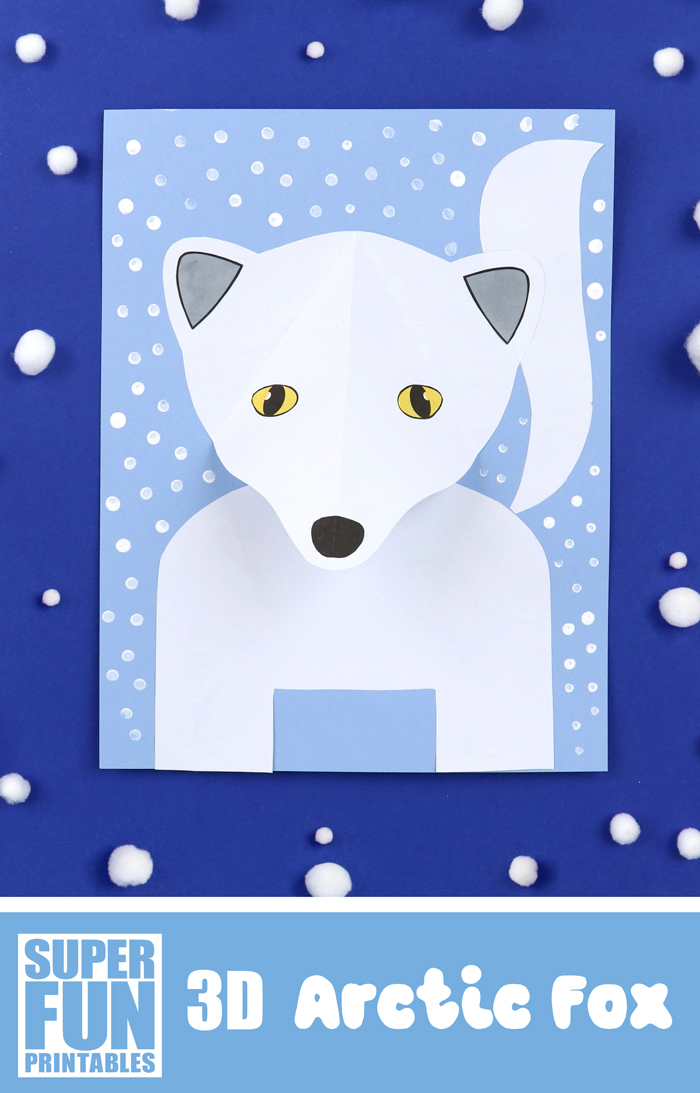
Make a 3D Arctic fox craft with a pop-out paper snout using this printable template. The fox is surrounded by falling snow kids can create by stamping with a cotton bud or Q-tip.
This Arctic fox craft is part of our Winter crafts collection, and is fun for kids of all ages with basic cutting, colouring, folding, gluing and paint-stamping involved.
Get your copy of the template here.
Seriously, how adorable are Arctic foxes? Not only are they cute and furry, but they are pretty amazing creatures!
Here are a few fascinating facts that you can discuss with kids whilst making the Arctic fox craft:
Cool Arctic fox facts for kids
- Arctic foxes have adapted to survive in temperatures of -50°C, or -58°F. When it’s really cold they wrap their tail around their bodies to help keep warm.
- They have an excellent sense of smell and also excellent hearing, which helps them catch their dinner
- Their favourite food is Lemmings, but they also eat seal pups, voles, sea birds and their eggs, and Polar Bear’s leftovers
- Arctic foxes live in complex burrows underground with many entrances. Their burrows can be centuries old and have been used by many generations of foxes.
- The fluffy white fur of arctic foxes changes to greyish brown in the summer, in order to camouflage them perfectly for each season
- To keep from slipping on the snow, Arctic foxes have a layer of fur on the base of each paw
- Arctic foxes are monogamous animals, meaning they choose one partner and stick with them for life
- Both the mother and father fox share the duties of looking after their pups. There are usually 5-8 pups in each litter but there can be up to 25!
Now let’s make one…
How to make a 3D Arctic Fox
You will need
- The Arctic Fox template printed onto ordinary white paper (also available in our TPT store)
- Card stock in a cool colour (eg any shade of blue) for your background
- Glue stick
- Scissors
- White paint (we’ve used acrylic)
- Cotton bud (Q-tip)
How To:
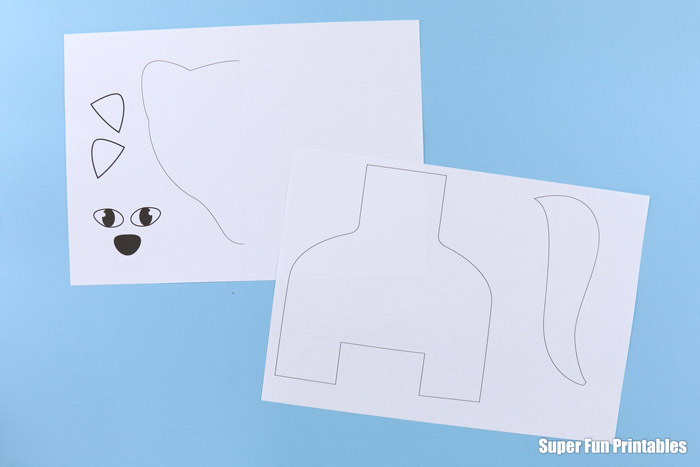
- Print the template onto plain white paper.
- Fold the page featuring the head shape in half along the dotted line and cut out around the black outline.
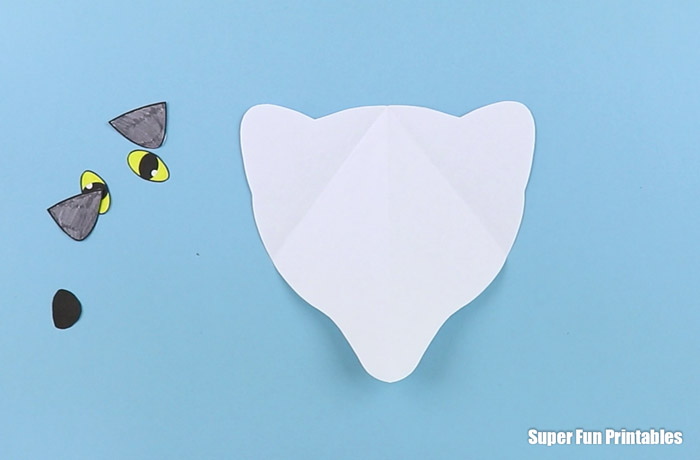
- Whilst the head is still folded, fold along the second dotted line at an angle.
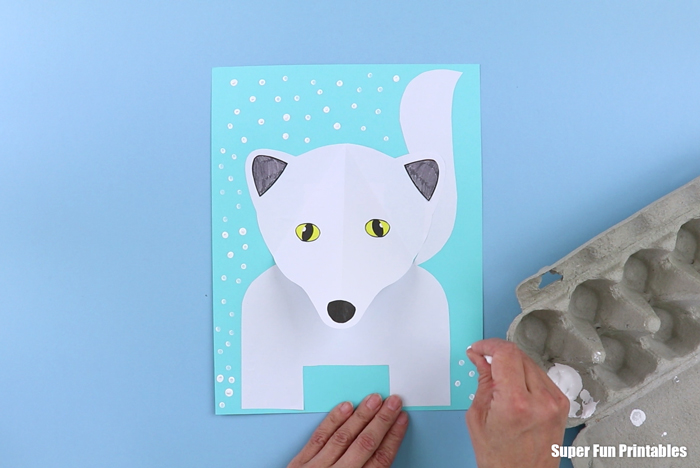
- Unfold the head and turn over so that the dotted lines are on the back. Fold this piece so that the nose “pops out” forward from the ears.
- Colour in the eyes and ears.
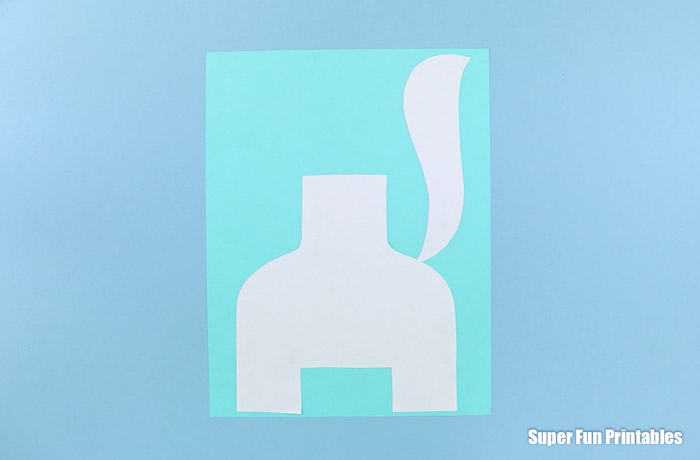
- Cut out the facial features, torso and tail shape, and glue the eyes, nose and ears onto the head.
- Glue the torso shape across the bottom of a sheet of colored card stock, then glue the tail to the top right of the torso. Place glue onto the ears section of the back of the head (do not place glue on the nose section), and glue so that the nose is poking up. The head will overlap the tail a little.
- Use a cotton bud/Q-tip to dot snowflakes around the Arctic Fox’s head.

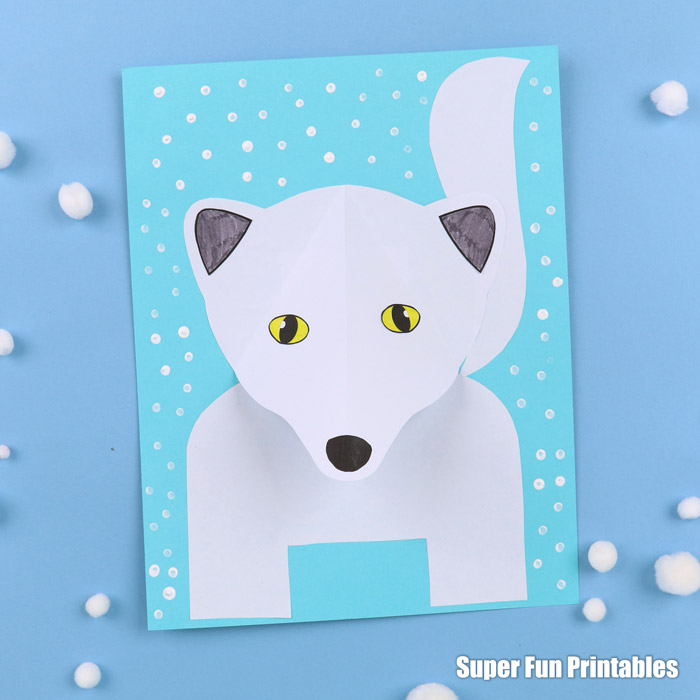
Isn’t he cute? Now he’s ready to hang on the wall.
Check out our Winter Craft Collection